
This guide explains how to create and configure your VPN from the Infrawire client area. Access your WireGuard configuration in a few clicks.
Info — This tutorial is for Infrawire VPN offers. Discover VPN offers →
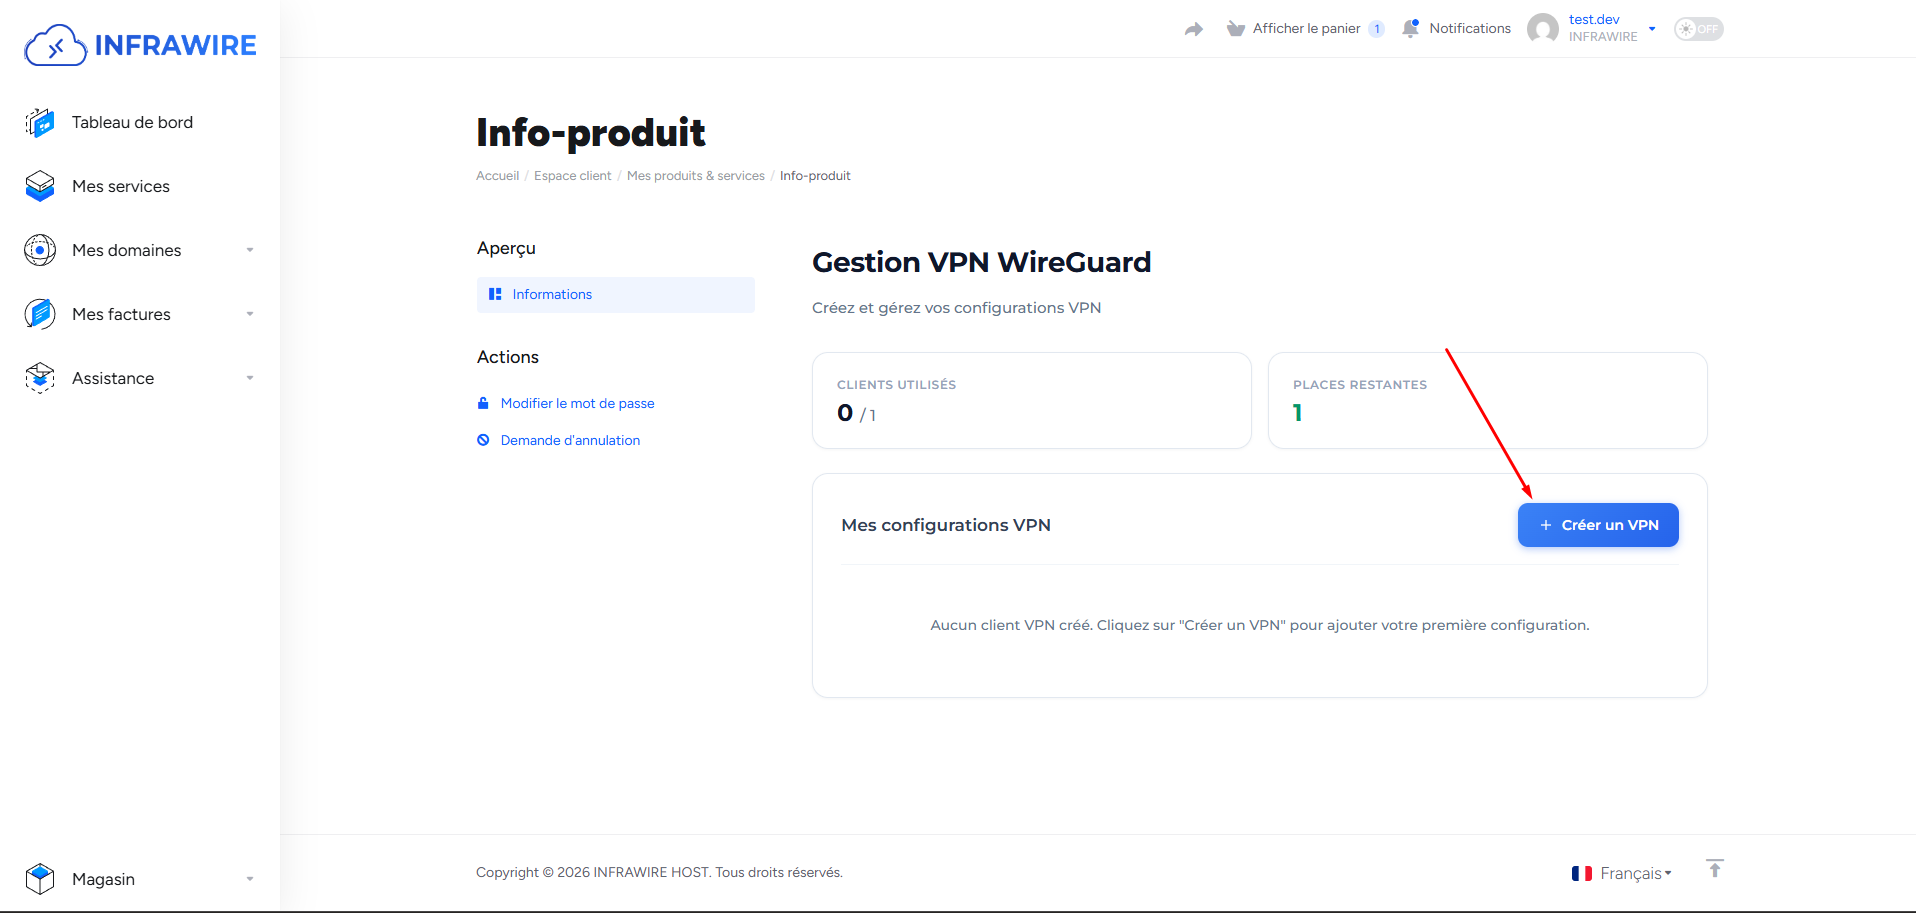
Step 1: VPN creation
To create a new VPN, click on the "Create a VPN" button in the client area.
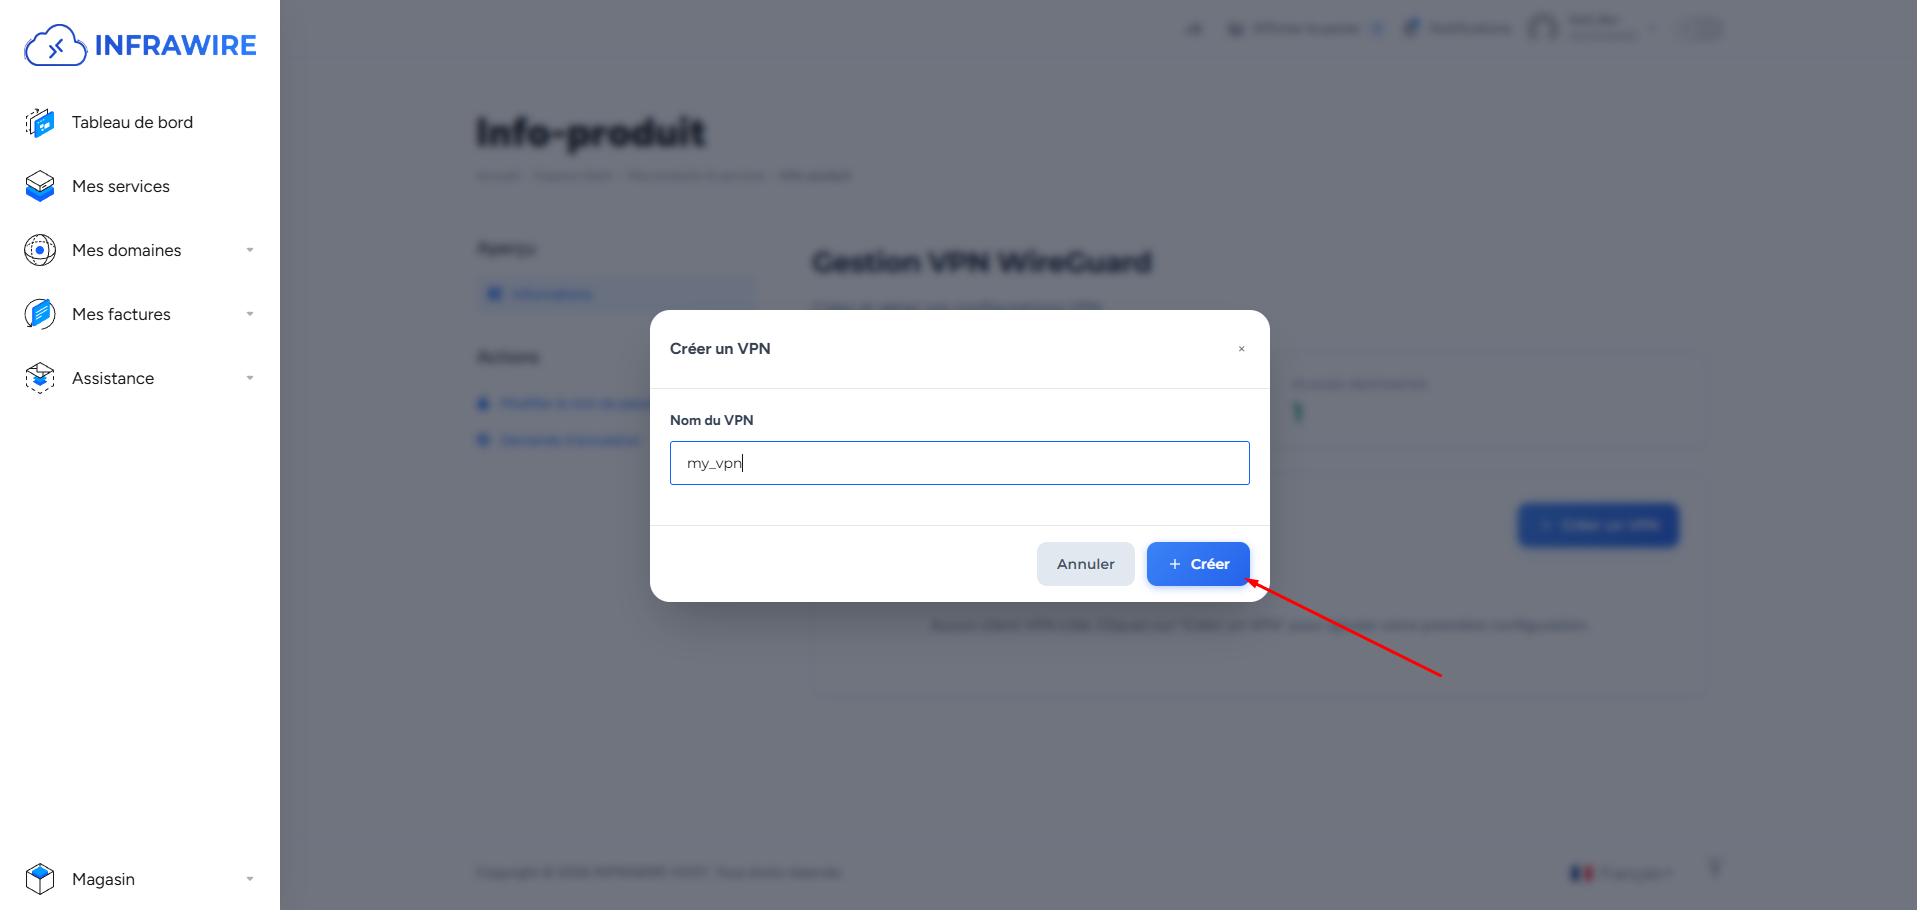
Step 2: VPN name
A form appears to enter your VPN name. Enter the desired name to identify your connection.
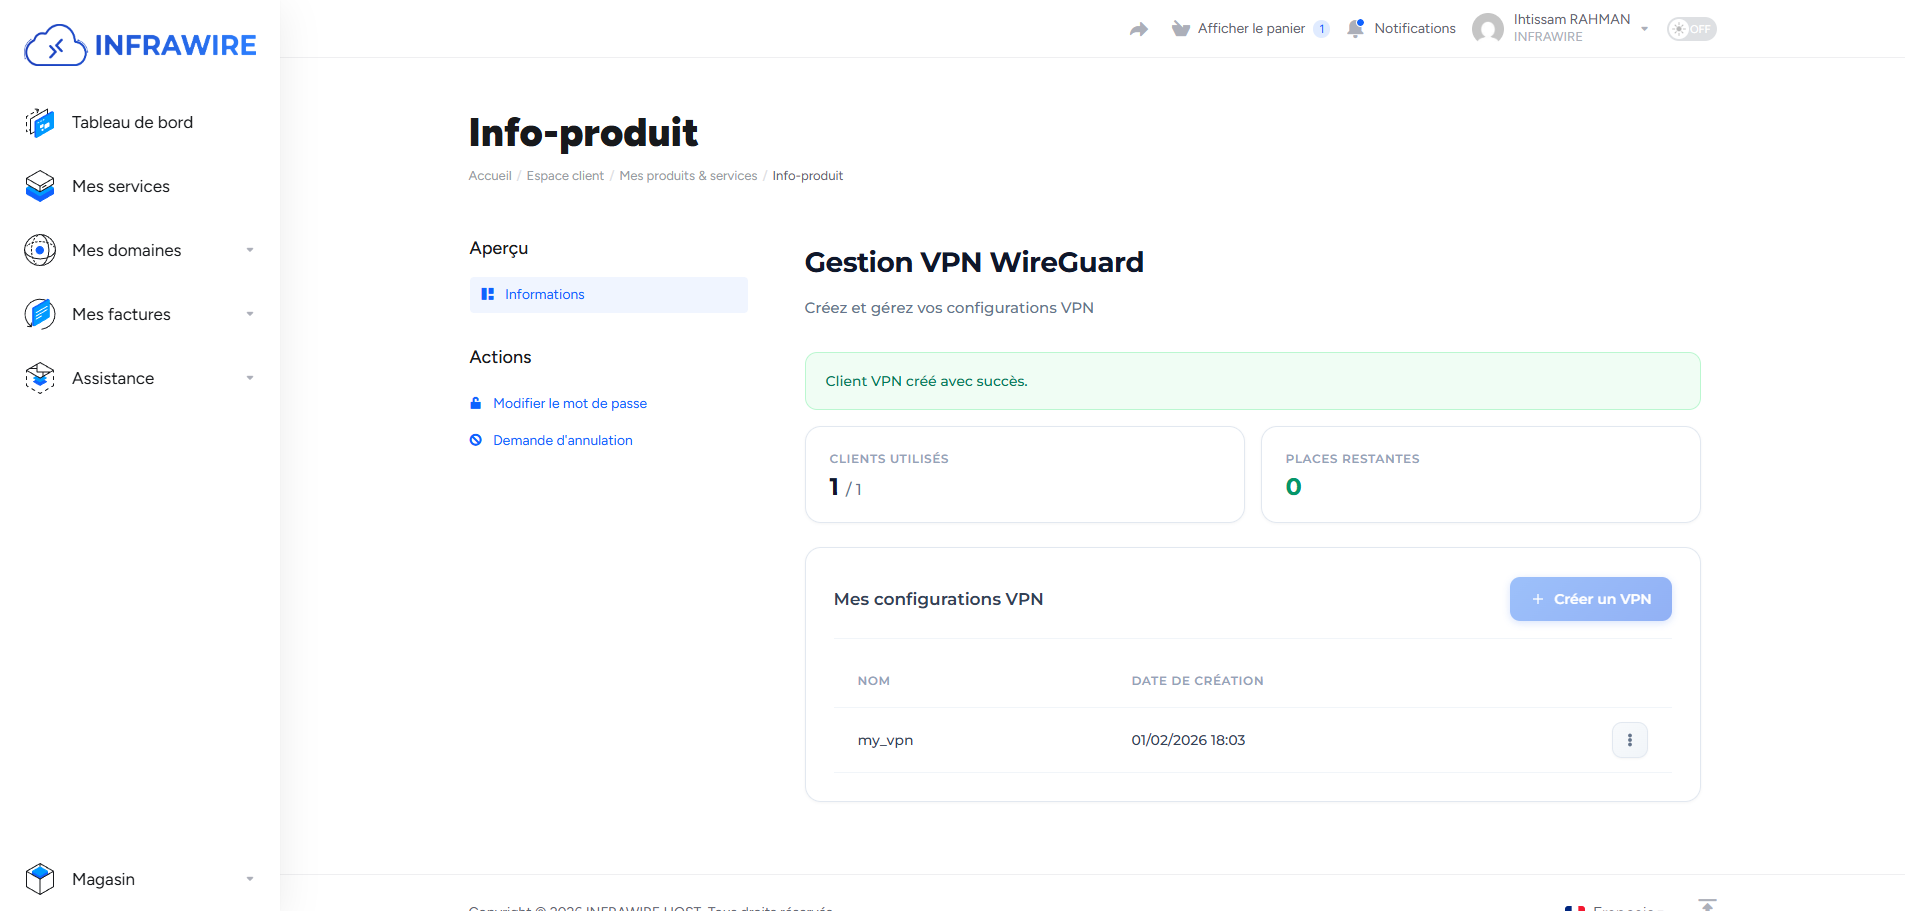
Step 3: VPN created
Once creation is complete, your VPN appears in the list. The VPN is now operational.
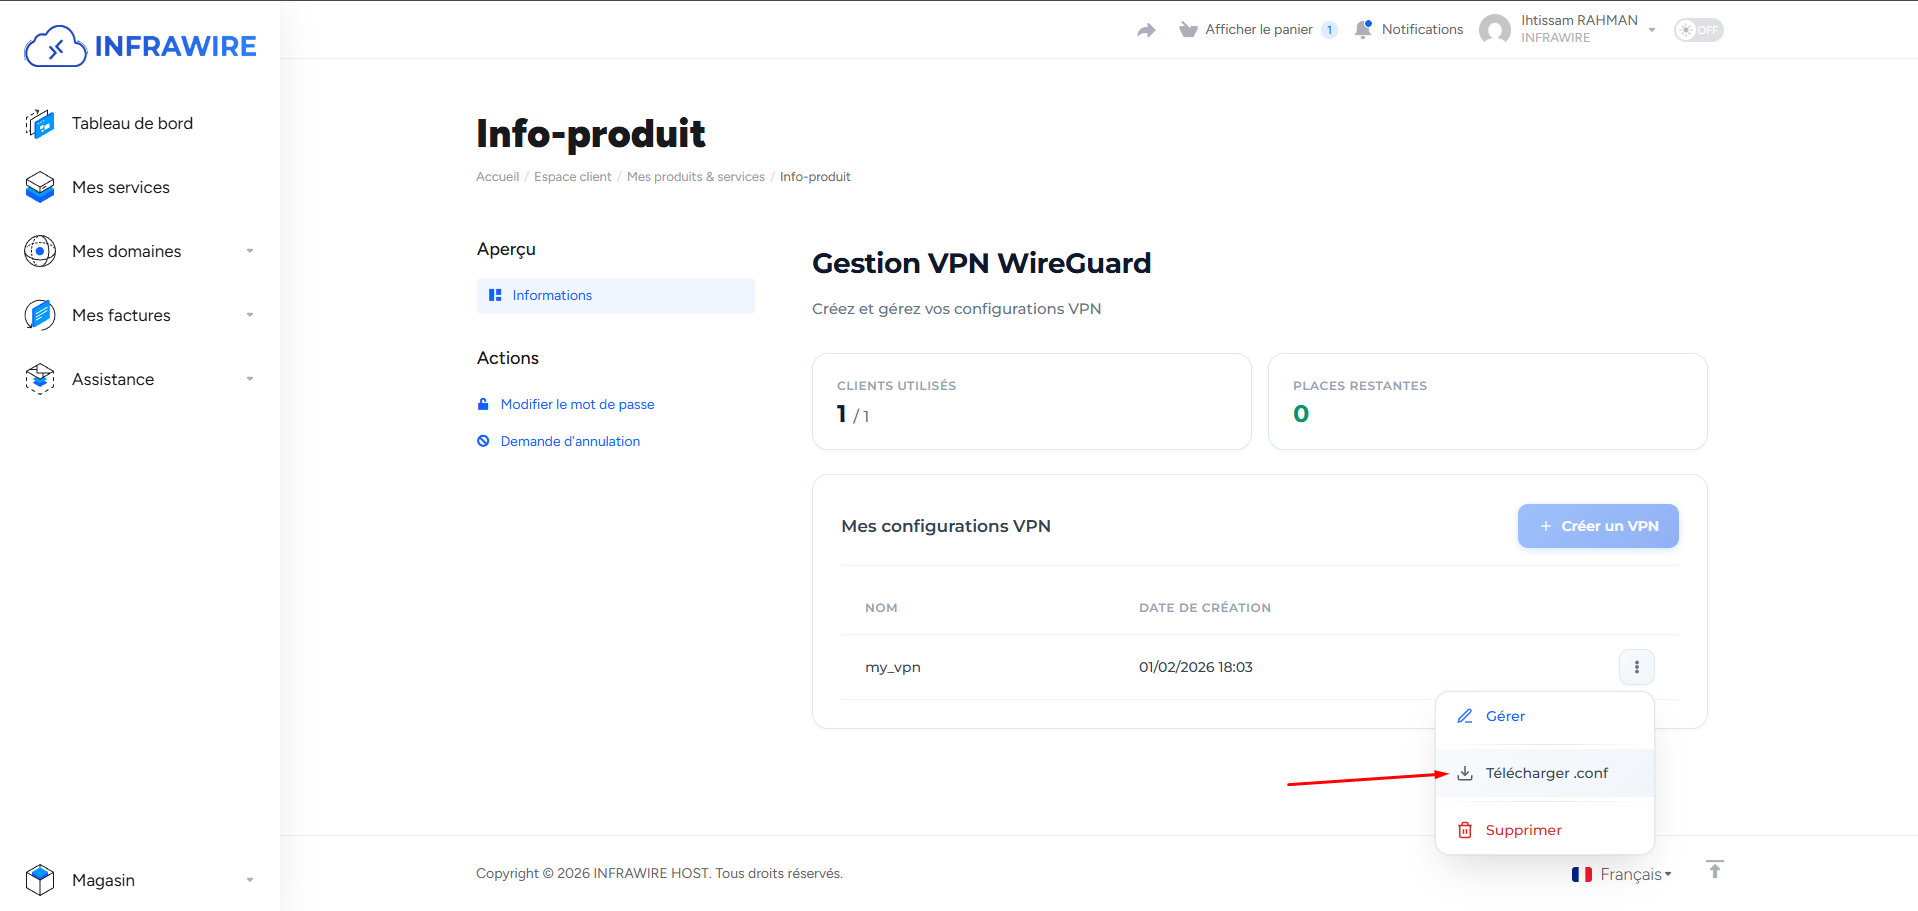
Step 4: Download the configuration file
To configure your WireGuard client, click on the "Download .conf" button to retrieve the configuration file. This file will allow you to connect to your VPN from any WireGuard-compatible device.
Step 5: Display and download the configuration
A window displays the details of your VPN configuration. To save the file to your device, click on the "Download" button.

Step 6: Install WireGuard on your computer
To perform this tutorial on a computer, go to the WireGuard application. You can download the Windows client at: https://download.wireguard.com/windows-client/wireguard-installer.exe
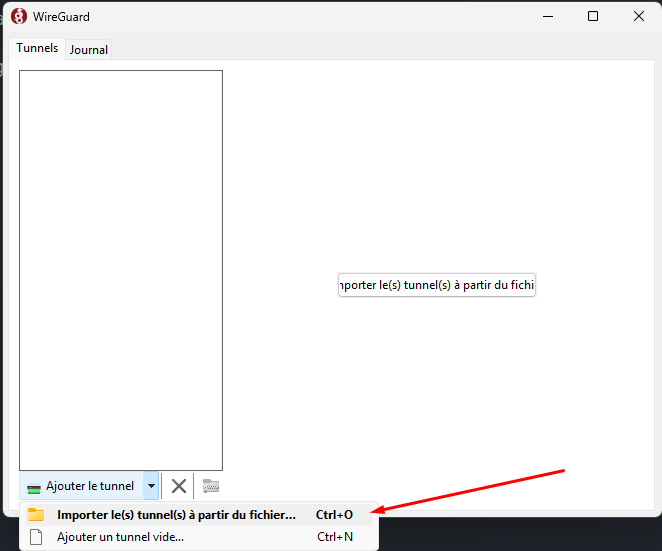
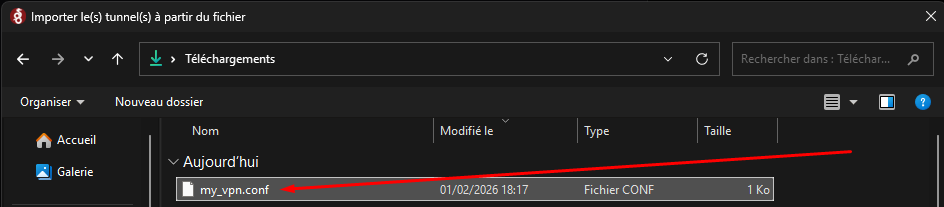
Step 7: Choose the .conf VPN file
In the WireGuard application, import the configuration file (.conf) that you downloaded from the client area. Select the file to activate your VPN connection.
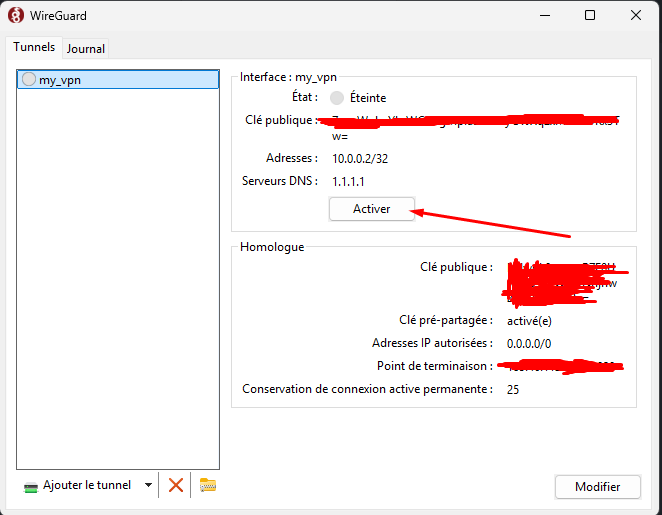
Step 8: Activate the VPN connection
The configuration file is imported! Connect by clicking on the "Activate" button.
That's it! Your VPN is activated. You can now browse the Internet safely, with an encrypted and protected connection. Enjoy your Infrawire VPN!